Pages

Wednesday, February 29, 2012

Essie Summer 2012 Collection Preview

Hey Guys,
This is not a haul but If I do get these later on. Ill post them up. I just found out what colors Essie will be releasing for their Summer 2012 collection. All the colors are bright, bold, and neon-ish. I'm not super excited but Essie doesn't usually disappoint so we can still look forward to the release. All the color names are supposed to be inspired by movies and cameras. Hence "poppy.razzy'? So here is the picture:

In no particular order, the names are 'Lights' 'Bazooka' 'Camera' and 'Action' 
This kinda reminds me of 4th grade English exercises where you have to pick out the one that doesn't match.
Bazooka? really?

but anyway, isn't this beeeeoootiful? The white color is supposed to be a re-release and its called 'Blanc' and the top coat's not new either but the overall colors look pretty nice.

Is it just me or does the Summer Collection look oddly familiar to the Spring ones?
(bottom 3)

Thanks for reading! Keep following for more updates and don't forget to Comment below!


Monday, February 27, 2012

Chandelier Nail Tutorial

Hey Guys,
Time for a new tutorial! We will being doing a design inspired by chandeliers. This design will require a lot more patience especially If you are doing your right hand (and vice versa for lefties) so yea, be patient and have fun!
This is what we will be working on today. This is my right hand since I liked how this turned out more. But I will be showing the tutorial with my left hand.
Supplies : Gold and white acrylic paint. A gray polish. (Im using 'Armed and Ready' Essie)
one dotting tool; we will be using the smaller dotting side, and a thin paintbrush.
First before I put base coat, I used the garlic method to strengthen my nails first. 
Start off with base coat.
Apply a gray polish. I used 2 coats.
Pour out some white and gold paint.
Now mix it till you get this color. I mixed white with gold because the metallic gold paint is too thin, mixing it with the white will give it a thicker consistency so that it will be easy to draw on your nails.
Put 3 dots on top of nail.
On the 3rd dot, draw three lines branching out from it like so.
On the middle dot branch out 2 curvy lines.
From the side lines branch out 2 curvy lines that over lap the middle ones.
Draw 2 dots on bottom.
From the last dot, branch out 2 upside-down curves.
Now on the same dot on top, draw 2 curved line facing up.
Using the dotting tool, put dots on each of the ends of the lines and where ever else you think looks nice.
Now onto the decorations
On the pinkie place dots like shown.
The other fingers are not chandeliers so place lines connecting from dot to dot wherever you want. kinda like lace. do the same to the other nails.
See theres no set pattern, place connecting lines as you wish. Only the ring finger is a chandelier.
The thumb is just  a random design

 This is my right hand
Right hand.

Thanks for reading and keep following for more updates!


Tuesday, February 21, 2012

How to get Strong, Hard Nails naturally

Hey Guys,
Sorry I've been MIA for so long. Been busy lately and my nails are weak so I've got to let them rest. Because my nails are weak, this is the perfect time to show you guys how I strengthen my nails without a nail hardener. All you need is Garlic. In fact, many store bought hardeners have garlic as one of the ingredients. Now let's get started:
 Have some garlic and a knife prepared
Rip off the skin 
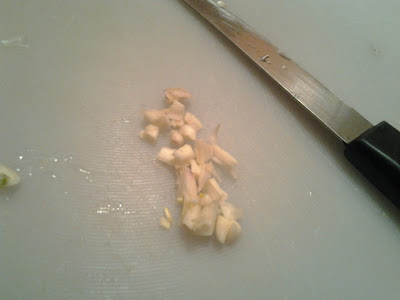
Dice it up into little pieces.
wash your hands to get the nails clean
Now, rub the garlic onto your fingernails. (Yes, u didnt read that wrong)
Do this to every nail. I mash it a bit to get the juices onto my nail better.
The juices is what makes the nails hard.
After you do this every nail, your fingers should be very sticky because of the garlic. Just wash your hands.  The nails will still be hard.
The garlic juice should keep your nails hard for 3-4 days. I love using this method to harden nails, its more natural than store bought ones which I actually find to still cause my nails to eventually chip.

NOTE: The garlic smell might remain on your nails a little long, just use lotion if you don't like the smell. Other than that one con, this is the perfect way to strengthen nails. Try it out yourselves!

Thanks for reading and following. I'll continue to try to keep updating as frequently as I can!
:)


Sunday, February 12, 2012

Tutorial: How to dry Nails Fast. EASY

Hey Guys,
Today I'm going to show you how to dry your nails fast without using any 'Quick-dry' polishes or those cooking sprays. This time we are only going to use the most natural thing : water. (actually ice). Once I found out about this method I could never go back. This nail-drying method lets me do my nails at 10 or 11 at night without having to worry about smudging when I go to sleep. So let's get started!

First of all you need a bowl, water, and a refrigerator ;)
Here I have a plastic bowl. Put in a couple of ice cubes.
Add some water. We will have to freeze it so adding ice cubes make freezing faster than just plain water.
Now pop it in the fridge.
Let it sit for 1-2 hours. (or less) Just enough so that some of the water is frozen and still slushy.
Unfortunately for me, I left it in a little too long.
but that's okay. Just add some water on top. It will get cold because of the ice.
Prepare to put in your nail.
(Warning: The water will be COLD. but no pain, no gain) Put your nail in and let it sit for 3 minutes. Take your finger out. warm it up again and dunk it back in so that it won't freeze. Do this for about  5+ minutes. The more the better. Be patient. this process takes less than half the time it would normally take for nails to air-dry.
And Voila, Finger-nail dried! (lolol awkward hand pose)

Tips: Do not use this method Immediately after painting on the polish. Wait for it to set a little before freezing it (15 min?). If you don't wait, freezing will take longer and there's a big chance that the polish will smudge.
But anyway, I use this method ALL the time and I love it! It really works. Try it out for yourself next time!


Thanks for reading, Comment below and keep following for more updates!


Monday, February 6, 2012

Golden Hearts Valentine Tutorial

Hey Guys,
It's almost that time of year again....Valentines! Its just around the corner so get your nails ready for that special someone or just for yourself to admire ^^. This one is pretty simple so lets get started!
This is what we will be working on today. I know all the usual tutorials use pink and red but this design gives off a more mature feel by using a maroon/purple color.
Supplies needed: Gold Acrylic paint, Essie's 'Carry On' and any dotting tool you own.
start off with base coat; especially when using a darker polish, you don't want your nails to stain.
Paint on 2 coats of polish.
Paint on one heart on the ring finger by dabbing with the dotting tool.
I call it "dab-and-drag" lol
Add some more hearts going in different directions.
Fill up the nail with hearts like a jigsaw puzzle.
Next work on your thumb. Start off the same way.
Add some more.
and fill it up. show some hearts poking out the side of your nail; you can just draw the tip or sides of the heart as well.
Put on the top coat to give it more shine and lock in the acrylic paint.
and we're done! A quick and simple tutorial not only for Valentines day!

Thanks for reading, Comment below and keep following for more updates!